Full WordPress FAQ Overview about the most asked questions
In this article I answer the top 15 most frequently asked questions about WordPress, Themes, Plugins, Backups, Security, etc.
Here you will find all the information you need to build a professional, fast and well designed WordPress Website for any kind of business.
- What is WordPress?
- Is WordPress free?
- What is the difference between WordPress.com and WordPress.org?
- How do I install WordPress?
- Can I use my own custom domain with WordPress.com?
- What are WordPress themes and plugins?
- Can I use any theme with WordPress?
- How do I add new pages or posts to my WordPress site?
- How do I customize my WordPress site?
- How do I make my WordPress site secure?
- Can I use WordPress for e-commerce?
- How do I use WordPress for SEO?
- How do I add images and videos to my WordPress site?
- How do I backup my WordPress site?
- How do I update WordPress?
1.) What is WordPress
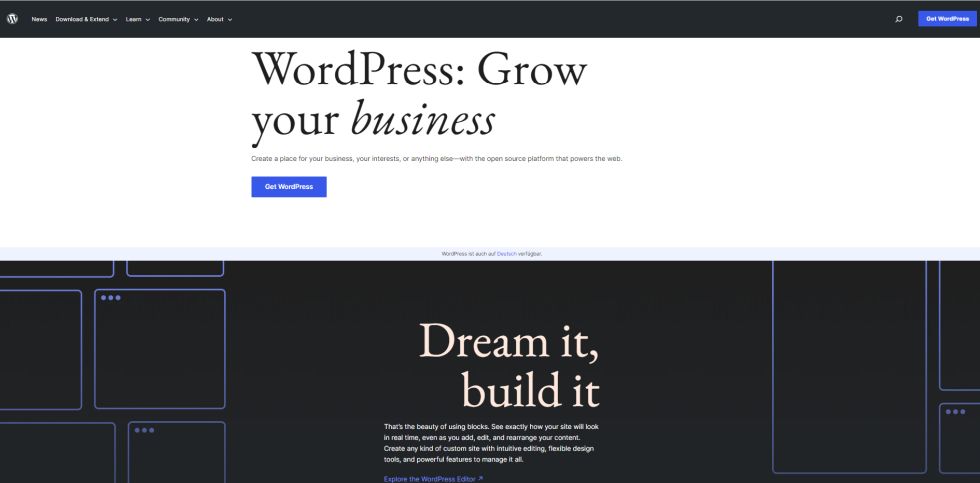
WordPress is an open-source content management system (CMS) that has been widely adopted for creating and managing websites, blogs, and online applications. It was first released in 2003 and has since become one of the most popular website building platforms, with an estimated 40% of websites worldwide using WordPress.
At its core, WordPress is written in PHP and uses a MySQL database to store content and data. The platform provides a user-friendly interface for designing and customizing websites, allowing users to create professional-looking sites without the need for extensive coding knowledge.
One of the main advantages of WordPress is its versatility. The platform is highly customizable, with a large number of themes and plugins available to enhance the appearance and functionality of a website. Themes are pre-designed templates that can be applied to a website to change its appearance and layout, while plugins are add-ons that can be installed to extend the functionality of the website.
Another advantage of WordPress is its ease of use. The platform features a simple and intuitive dashboard that allows users to manage the content of their website, create new pages and posts, and make changes to the design of the site. The platform also offers a wide range of tools for managing and organizing content, including built-in SEO optimization, the ability to schedule posts in advance, and the option to categorize and tag posts.
In addition to its ease of use, WordPress is also known for its robust security features. The platform is regularly updated to address potential security vulnerabilities, and users can also install security plugins to enhance the security of their website. Additionally, the open-source nature of WordPress means that a large community of developers and users is constantly working to improve the platform and identify potential security threats.
In conclusion, WordPress is a highly versatile, user-friendly, and secure platform for creating and managing websites. Its open-source nature, combined with its ease of use, versatility, and security features, make it an ideal choice for both individuals and organizations looking to establish a presence on the web.
2.) Is WordPress free?
WordPress is open-source software, meaning that its source code is available for anyone to use and modify. This has led to the widespread belief that WordPress is a completely free platform. However, it is important to understand that while the core software is free, there are many other costs associated with building and maintaining a website using WordPress.
The core software of WordPress can be downloaded and installed on a web server for free. This includes the basic features and functionality necessary to create and manage a website. This includes a simple editor, various themes and plugins, and the ability to customize the appearance and functionality of the site.
However, in order to create a fully functional website, there are several other costs that need to be taken into account. For example, a domain name and web hosting must be purchased. A domain name is the address of a website, such as “www.example.com,” and web hosting is the service that stores and serves the files that make up a website. These services typically cost money, although there are some free options available.
Another cost that must be considered is the cost of themes and plugins. Themes are pre-designed templates that can be used to change the look and feel of a website. Plugins are add-ons that add additional functionality to the site. While there are many free themes and plugins available, many of the best ones require payment.
In addition to these costs, there are also the costs associated with customizing and maintaining the site. For example, if a site owner wants to add a custom feature or change the appearance of the site, they may need to hire a developer to do the work. This can be expensive, especially if the site is complex.
In conclusion, while the core software of WordPress is free, building and maintaining a website using the platform can be quite expensive. Between the costs of domain names, web hosting, themes, plugins, and customizations, the total cost can add up quickly. However, for many people, the flexibility and power of WordPress make it worth the investment.
3.) What is the difference between WordPress.com and WordPress.org?
There are two versions of WordPress, WordPress.com and WordPress.org, and they differ in several important ways.
WordPress.com is a fully hosted platform, which means that users don’t need to worry about hosting their website on a server. Instead, WordPress.com provides users with a fully managed hosting environment and takes care of all the technical aspects of running a website, including security, backups, and updates. Additionally, users have access to a range of pre-designed themes and plugins to customize their website, and the platform is easy to use, even for those with little or no technical skills.
On the other hand, WordPress.org is a self-hosted platform, which means that users must arrange their own hosting and manage all the technical aspects of running a website themselves. This can be more complex than using WordPress.com, but it also gives users complete control over their website, including access to all the code and the ability to install any plugin or theme they want.
Another important difference between the two platforms is the cost. WordPress.com offers a free version, but users must pay for additional features and storage space. Meanwhile, WordPress.org is completely free, but users must pay for hosting, domain registration, and other services.
In terms of customization, WordPress.org offers much more flexibility and control than WordPress.com. Users can edit the code of their website, install any plugin or theme they want, and create a truly unique website. In contrast, WordPress.com users are limited to the themes and plugins provided by the platform, and they cannot make changes to the code.
Finally, it’s important to consider the target audience when deciding between WordPress.com and WordPress.org. WordPress.com is ideal for beginners and those looking for an easy-to-use platform for personal blogs or small websites. On the other hand, WordPress.org is a better choice for businesses, online stores, and more advanced users who want complete control over their website and the ability to customize it to their specific needs.
In conclusion, WordPress.com and WordPress.org are both powerful platforms, but they are designed for different users and purposes. Whether you choose WordPress.com or WordPress.org will depend on your needs, budget, and technical skills. Both platforms have their strengths and weaknesses, so it’s important to weigh the pros and cons before making a decision.
4.) How do I install WordPress?
Installing WordPress is a simple process that can be completed in a few steps. WordPress is a popular content management system (CMS) that is used to create websites and blogs. It is an open-source platform, which means that it can be freely downloaded and used by anyone. The following is a step-by-step guide on how to install WordPress on your own web server.
Step 1: Choose a web host
The first step to installing WordPress is to choose a web host. A web host is a company that provides server space to host your website. There are many web hosting companies to choose from, and the majority of them offer an easy one-click installation process for WordPress. Some popular web hosting companies include Bluehost, HostGator, and SiteGround.
Step 2: Download WordPress
Once you have chosen a web host, the next step is to download the latest version of WordPress from the official WordPress website. You can download the software for free by visiting https://wordpress.org/download/.
Step 3: Create a database
Next, you need to create a database for your WordPress installation. Your web host will usually provide a tool for creating databases, such as cPanel. Once you have created your database, make note of the database name, username, and password.
Step 4: Upload and extract the WordPress files
After downloading the WordPress software, you will need to upload it to your web server. You can do this using an FTP client such as FileZilla. Once the files have been uploaded, extract them to the desired location on your server.
Step 5: Configure the wp-config.php file
The next step is to configure the wp-config.php file. This file is used to connect your WordPress installation to the database that you created in step 3. Open the wp-config-sample.php file in a text editor and replace the default database information with the information for your database.
Step 6: Run the installation script
Once the wp-config.php file has been configured, you can run the installation script. Open a web browser and navigate to the URL of your WordPress installation, such as http://www.example.com/wordpress. You will be prompted to enter information such as the site title, admin username and password, and email address.
Step 7: Complete the installation process
Finally, complete the installation process by following the instructions provided on the screen. This process will create the necessary tables in your database and install the WordPress software.
In conclusion, installing WordPress is a simple process that can be completed in just a few steps. By following the steps outlined above, you can have a fully functional WordPress website up and running in no time. With its user-friendly interface and powerful features, WordPress is the perfect platform for creating a website or blog.
5.) Can I use my own custom domain with WordPress.com?
Yes, you can use your own custom domain with WordPress.com, but there are some limitations to consider.
WordPress.com is a hosting platform for websites that provides a simplified way to create a website using its content management system (CMS). The platform offers several plans, including a free plan that includes a subdomain (e.g., yourusername.wordpress.com) and paid plans that offer additional features and customization options.
One of the customization options available with paid plans is the ability to use a custom domain, which is a unique web address that replaces the default subdomain provided by WordPress.com. To use a custom domain with WordPress.com, you need to purchase a domain from a domain registrar, such as GoDaddy or Namecheap, and then link it to your WordPress.com site.
However, there are some limitations to using a custom domain with WordPress.com. First, while you can use your own domain name, the platform still controls the underlying infrastructure and hosting of your site, meaning you don’t have full control over your website. Additionally, some plugins and themes may not be available with WordPress.com, which can limit your ability to customize and extend your site.
Another limitation to consider is that you will be required to use WordPress.com ads on your site if you have a free plan. If you opt for a paid plan, the ads can be removed, but you will still be required to comply with WordPress.com’s terms of service and content guidelines.
In conclusion, using a custom domain with WordPress.com is possible, but it comes with some limitations, including a lack of full control over your site, limited customization options, and the requirement to use WordPress.com ads or comply with its terms of service and content guidelines. Before choosing to use a custom domain with WordPress.com, it is important to weigh these limitations against your specific needs and goals for your website.
6.) What are WordPress themes and plugins?
WordPress provides users with a flexible platform that allows them to customize the look, feel, and functionality of their website to suit their needs. Two of the key components that make this customization possible are WordPress themes and plugins.
WordPress themes are pre-designed templates that determine the layout and appearance of a website. They control the visual design elements such as colors, fonts, and background images, and provide a structured framework for displaying content. Themes can be used to give a website a professional and cohesive look and can be easily customized to suit the needs of different types of websites, from blogs to e-commerce sites. There are thousands of free and premium themes available for WordPress users, and many can be easily installed with a few clicks from the WordPress theme repository.
Plugins, on the other hand, are small software applications that can be added to a WordPress site to extend its functionality. Unlike themes, which focus on the design and appearance of a website, plugins focus on adding new features and functionality to a site. For example, a plugin might allow users to add a contact form to their website, add social media sharing buttons, or improve the site’s search engine optimization (SEO). There are tens of thousands of plugins available for WordPress users, many of which are free and can be easily installed from the WordPress plugin repository.
In conclusion, WordPress themes and plugins are essential components of the WordPress platform that allow users to customize the look, feel, and functionality of their website. They are easy to use and provide a flexible and powerful platform for building and managing a wide variety of websites. Whether you’re a blogger, business owner, or website developer, WordPress themes and plugins are a valuable tool for creating a website that meets your needs and stands out from the crowd.
7.) Can I use any theme with WordPress?
Yes, you can use any theme with WordPress. WordPress is an open-source content management system (CMS) that provides a platform for building websites and blogs. One of the key benefits of using WordPress is its versatility, which is largely due to the availability of a wide variety of themes.
A theme is a collection of templates, styles, and functionalities that determine the look, feel, and functionality of your website. Themes can be used to change the appearance of your website without altering its content or functionality. With WordPress, you have access to thousands of free and premium themes that you can use to build your website.
Free themes are available in the WordPress repository, which is a collection of themes and plugins that have been reviewed and approved by the WordPress community. These themes are often basic in design and functionality, but they are suitable for a wide range of websites and blogs. Some free themes are also well-designed and come with advanced features, such as responsive design, multiple layouts, and custom widgets.
Premium themes, on the other hand, are typically sold by third-party developers and offer more advanced features and customization options. These themes are designed for a specific type of website or niche, such as e-commerce, portfolios, or photography. Premium themes often come with support and regular updates, making them a good choice for more complex websites.
In conclusion, you can use any theme with WordPress, whether it is a free or premium theme. The choice of theme will depend on your specific needs and the type of website you want to build. With so many themes available, you are sure to find one that is perfect for your website. Just be sure to choose a theme that is compatible with the latest version of WordPress and that is well-supported by the developer.
8.) How do I add new pages or posts to my WordPress site?
Adding new pages or posts to your WordPress site is a simple and straightforward process. Whether you are adding content to an existing page or creating a new one, the process remains the same. In this essay, we will go over the steps in detail so that you can easily add new pages or posts to your WordPress site.
Step 1: Log into your WordPress Dashboard
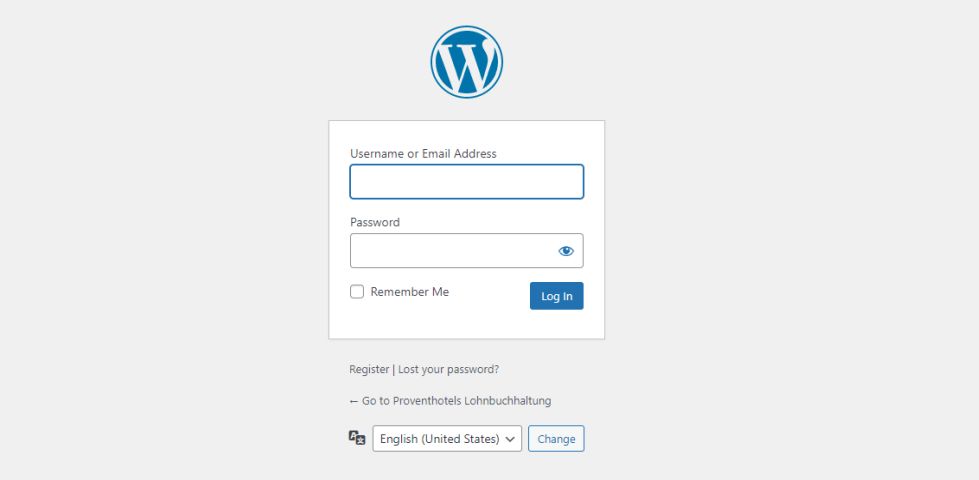
The first step in adding a new page or post to your WordPress site is to log into your WordPress Dashboard. This is the administrative area of your site where you can manage and make changes to the content and appearance of your site. To log in, simply go to your website’s URL followed by “/wp-admin” (e.g. www.yourwebsite.com/wp-admin) and enter your username and password.
Step 2: Add a New Page
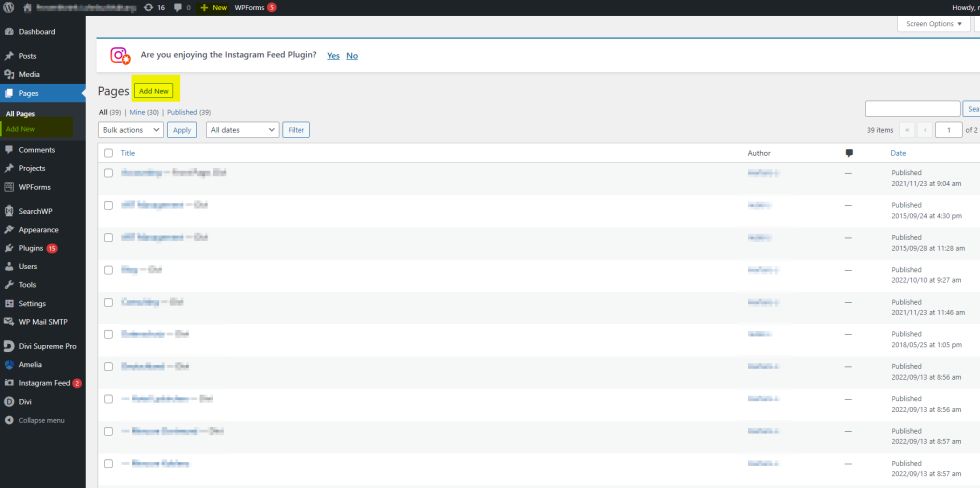
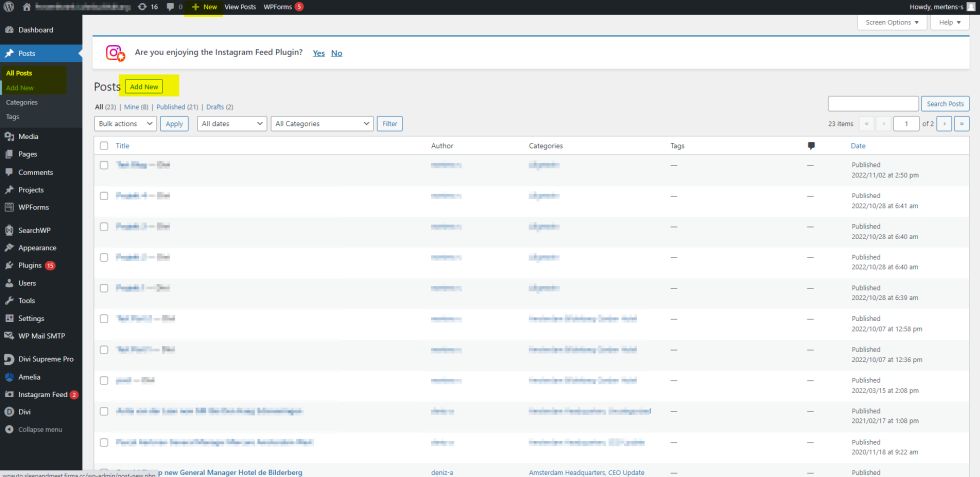
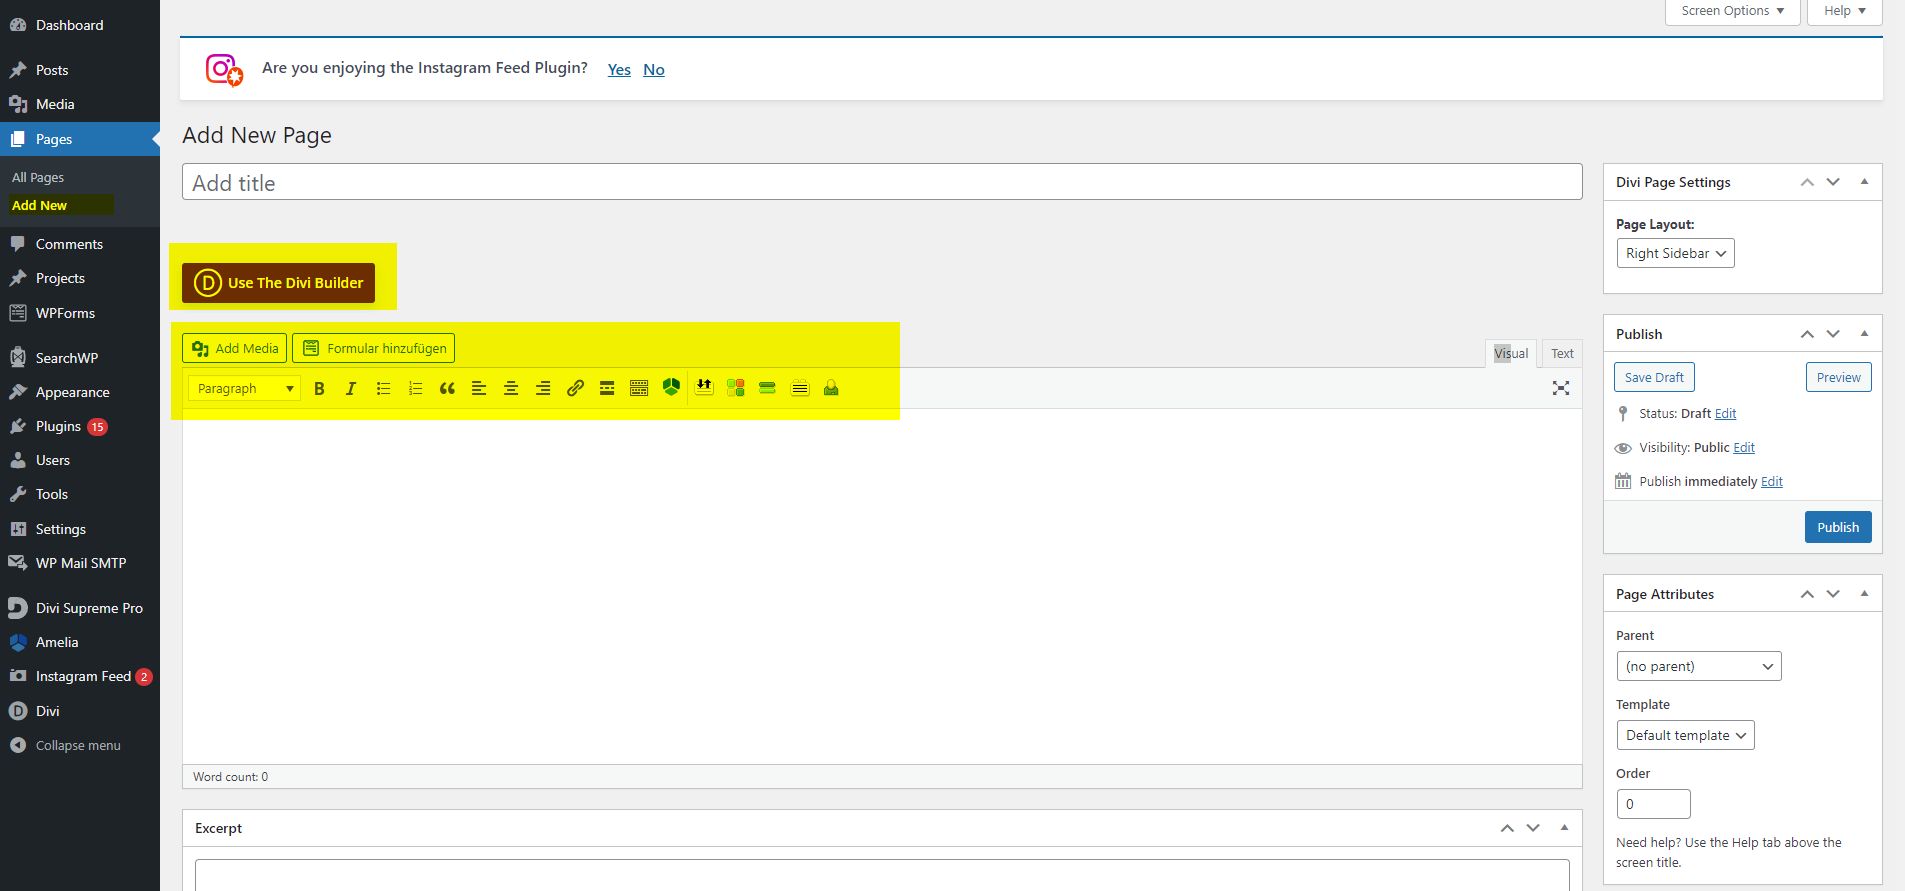
Once you are logged in to your WordPress Dashboard, you can add a new page to your site by clicking on the “Pages” option in the left-hand menu. Then, click on the “Add New” button at the top of the page. You will be taken to a new page where you can enter the title and content of your new page. You can also add images, videos, and other media to your page by clicking on the “Add Media” button above the content area.
Step 3: Add a New Post
If you want to add a new post to your WordPress site, click on the “Posts” option in the left-hand menu. Then, click on the “Add New” button at the top of the page. You will be taken to a new page where you can enter the title and content of your new post. You can also add images, videos, and other media to your post by clicking on the “Add Media” button above the content area.
Step 4: Formatting and Publishing Your Content
Once you have added your content to your new page or post, you can format it by using the various tools available in the WordPress editor. For example, you can add headings, lists, and links, change the font style and size, and add images and videos to your content. You can also add categories and tags to your post to help organize and categorize your content.
When you are ready to publish your content, simply click on the “Publish” button at the top right-hand corner of the page. Your new page or post will now be live on your website for the world to see.
In conclusion, adding new pages or posts to your WordPress site is a simple and straightforward process. With these steps, you can easily add new content to your site and keep it updated and fresh. So, go ahead and start adding new pages and posts to your site today!
9.) How do I customize my WordPress site?
Customizing your WordPress site is a great way to give it a unique look and feel that sets it apart from other sites. There are a number of different ways you can customize your WordPress site, including changing the theme, customizing the theme’s settings, adding plugins and widgets, and modifying the site’s CSS and HTML. In this essay, we’ll go over these methods in detail so that you can easily customize your WordPress site.
Step 1: Choose a Theme
The first step in customizing your WordPress site is to choose a theme. A theme is a pre-designed template that controls the look and feel of your site. There are many free and paid themes available for WordPress, and you can choose the one that best fits your needs and style. To change your theme, simply log into your WordPress Dashboard and go to the “Appearance” > “Themes” section. From there, you can browse through the available themes and select the one you want to use.
Step 2: Customize the Theme’s Settings
Once you have chosen a theme, you can further customize it by using the theme’s settings. These settings allow you to change things like the color scheme, font styles, and layout of your site. To access the theme’s settings, go to the “Appearance” > “Customize” section in your WordPress Dashboard. From there, you can make changes to the theme’s settings and see the results in real-time.
Step 3: Add Plugins and Widgets
Plugins and widgets are a great way to add new features and functionality to your WordPress site. There are thousands of plugins available for WordPress, including social media plugins, e-commerce plugins, and more. To add a plugin, simply go to the “Plugins” > “Add New” section in your WordPress Dashboard and search for the plugin you want to use. Once you have installed and activated the plugin, you can customize it and add it to your site by using widgets.
Step 4: Modify the Site’s CSS and HTML
If you have some experience with CSS and HTML, you can take your site customization to the next level by modifying the site’s code. This allows you to make more advanced changes to the look and feel of your site, such as adding custom styles and changing the layout. To modify your site’s CSS, go to the “Appearance” > “Editor” section in your WordPress Dashboard and find the stylesheet (style.css) file. To modify your site’s HTML, go to the ” Pages” or ” Posts” section and find the page or post you want to edit.
In conclusion, customizing your WordPress site is a great way to make it stand out and reflect your unique style and personality. By choosing a theme, customizing the theme’s settings, adding plugins and widgets, and modifying the site’s CSS and HTML, you can create a site that is truly yours. So go ahead and start customizing your WordPress site today!
10.) How do I make my WordPress site secure?
Securing your WordPress site is an essential part of running a website. With so much sensitive information being stored and transmitted online, it’s important to take the necessary steps to protect your site and your visitors’ information. In this essay, we’ll go over some of the key steps you can take to make your WordPress site secure.
Step 1: Keep Your WordPress Software Up-to-Date
The first step in securing your WordPress site is to keep your WordPress software up-to-date. WordPress regularly releases updates to fix security vulnerabilities and improve the platform’s functionality. By keeping your WordPress software up-to-date, you can ensure that your site is protected against the latest threats. To update your WordPress software, simply log into your WordPress Dashboard and go to the “Dashboard” > “Updates” section. From there, you can easily update your WordPress software with just a few clicks.
Step 2: Use Strong Passwords and Usernames
Another important step in securing your WordPress site is to use strong passwords and usernames. A strong password should be at least 12 characters long and include a mix of letters, numbers, and symbols. Avoid using easily guessable information, such as your name or date of birth, in your username or password. You should also consider using a password manager to generate and store strong passwords for you.
Step 3: Install a Security Plugin
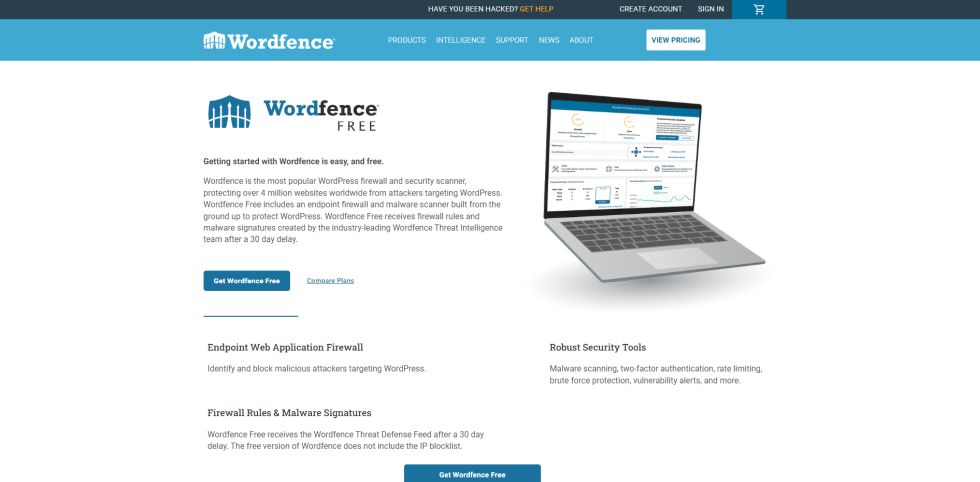
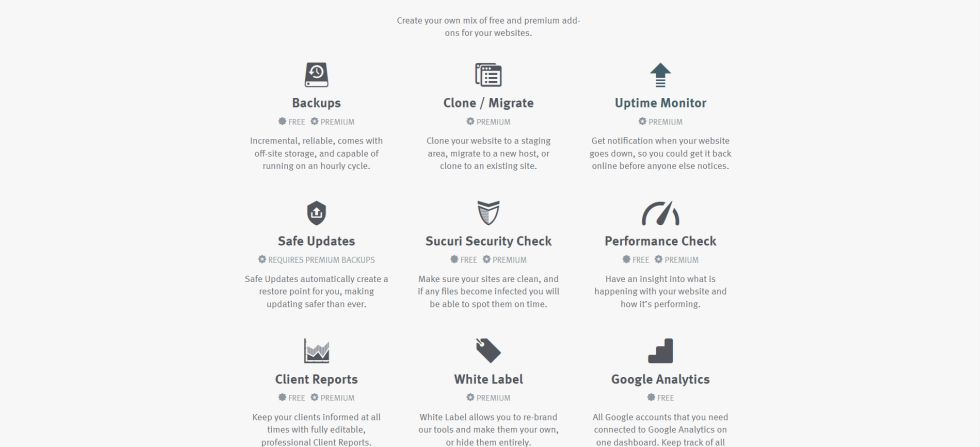
Installing a security plugin is a great way to enhance the security of your WordPress site. Security plugins can help protect your site against common threats, such as malware, SQL injection, and brute-force attacks. Some popular security plugins include Wordfence, Sucuri Security, and All In One WP Security and Firewall. To install a security plugin, simply go to the “Plugins” > “Add New” section in your WordPress Dashboard and search for the plugin you want to use.
Step 4: Use SSL/TLS Encryption
Using SSL/TLS encryption is another important step in securing your WordPress site. SSL/TLS encryption ensures that the data transmitted between your site and your visitors’ browsers is encrypted, making it more difficult for hackers to intercept and steal sensitive information. To use SSL/TLS encryption, you will need to obtain an SSL certificate and install it on your website. Many web hosting providers offer free SSL certificates, so be sure to check with your provider to see if this is an option for you.
Step 5: Regularly Backup Your Site
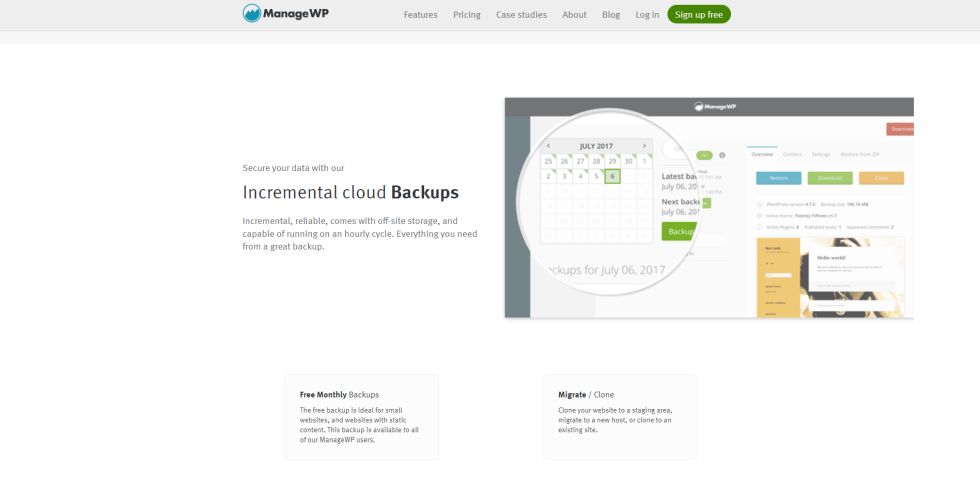
Finally, it’s important to regularly backup your WordPress site. Having a backup of your site can help you quickly recover from a security breach or other disaster. There are many plugins available that can automate the backup process, such as UpdraftPlus, BackWPup, and VaultPress. Simply go to the “Plugins” > “Add New” section in your WordPress Dashboard and search for the plugin you want to use.
In conclusion, securing your WordPress site is an essential part of running a website. By keeping your WordPress software up-to-date, using strong passwords and usernames, installing a security plugin, using SSL/TLS encryption, and regularly backing up your site, you can help ensure that your site is protected against common threats. So start taking these steps to secure your WordPress site today!
11.) Can I use WordPress for e-commerce?
Yes, you can use WordPress for e-commerce. In fact, WordPress has become a popular platform for building online stores due to its ease of use, flexibility, and large community of developers. With the right tools and plugins, you can build a robust e-commerce website with WordPress.
Step 1: Choose a WordPress e-commerce plugin
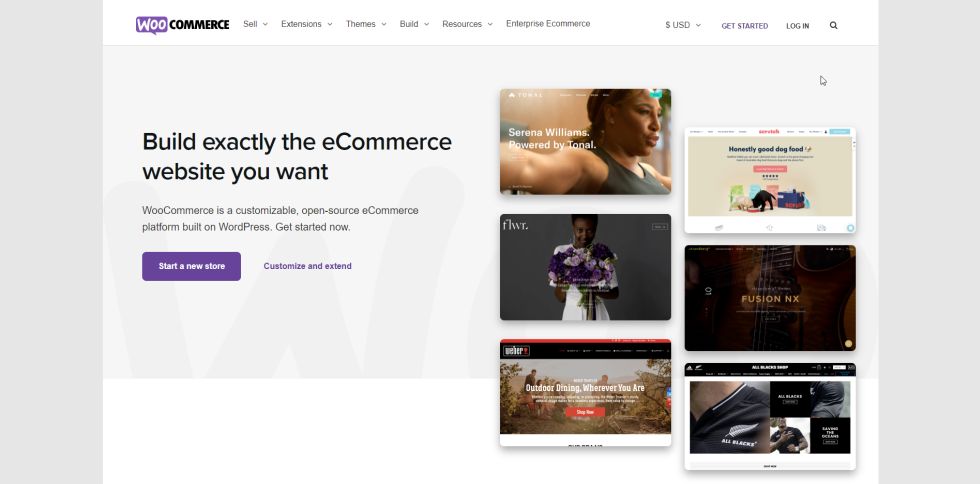
The first step in using WordPress for e-commerce is to choose an e-commerce plugin. There are several e-commerce plugins available for WordPress, including WooCommerce, Easy Digital Downloads, and Shopify. Each plugin has its own set of features and capabilities, so it’s important to choose the one that best fits your needs. WooCommerce, for example, is a popular choice for building online stores because it’s free, easy to use, and has a large community of developers who create extensions and themes for the plugin.
Step 2: Set up your store
Once you have chosen an e-commerce plugin, the next step is to set up your store. This typically involves creating product pages, setting up payment options, and configuring shipping and tax options. Depending on the plugin you choose, you may also be able to add product variations, manage inventory, and create discount codes.
Step 3: Customize the look and feel of your store
The third step in using WordPress for e-commerce is to customize the look and feel of your store. This can be done by using a pre-made theme or by customizing a theme to fit your specific needs. There are many e-commerce themes available for WordPress, both free and paid, that are specifically designed for online stores.
Step 4: Start accepting payments
The final step in using WordPress for e-commerce is to start accepting payments. This typically involves setting up a payment gateway, such as PayPal or Stripe, and integrating it with your WordPress store. Payment gateways allow you to securely process payments and manage transactions from your online store.
In conclusion, using WordPress for e-commerce is a great choice for building an online store. With the right tools and plugins, you can create a robust e-commerce website that is easy to set up, customize, and manage. So if you’re looking to start an online store, consider using WordPress as your platform!
12.) How do I use WordPress for SEO?
Search Engine Optimization (SEO) is the process of optimizing your website to rank higher in search engine results pages (SERPs) for relevant keywords and phrases. Using WordPress for SEO is a great choice as it provides several built-in features and plugins that can help you improve your website’s visibility and ranking in search engines.
Step 1: Choose a WordPress theme optimized for SEO
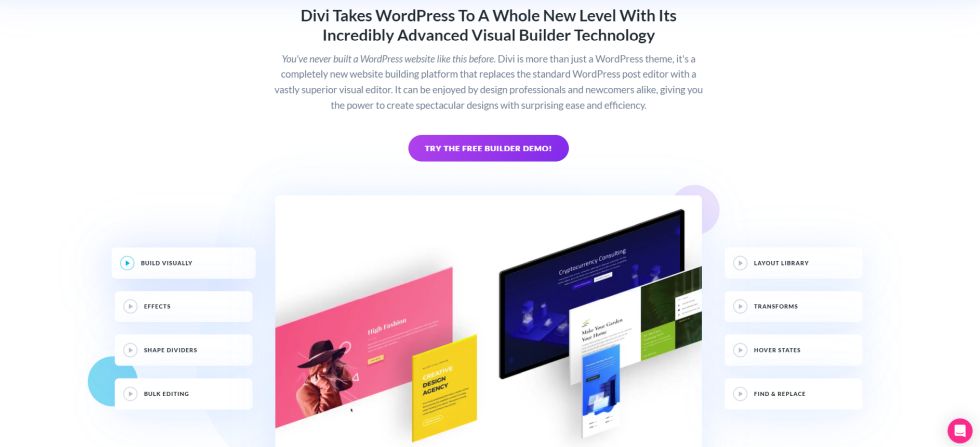
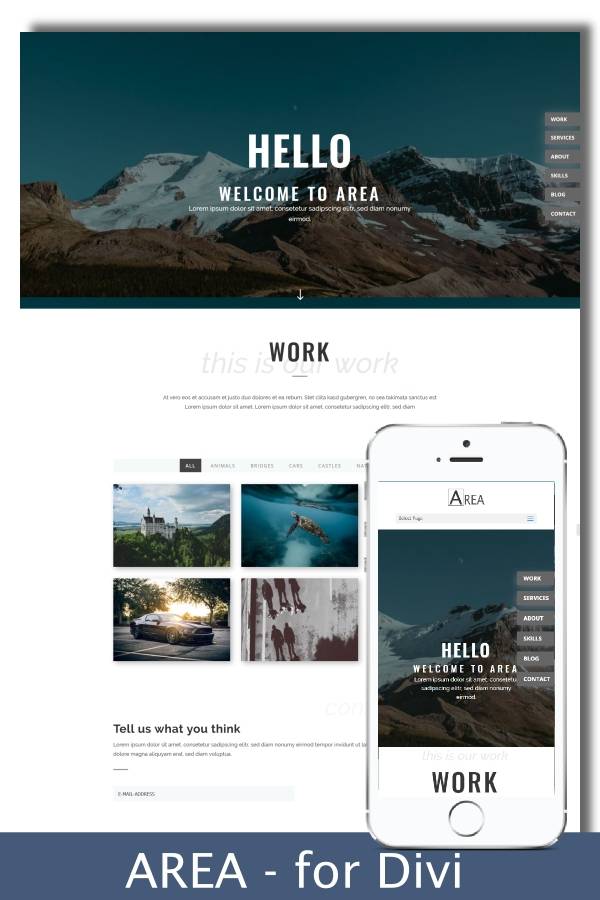
The first step in using WordPress for SEO is to choose a theme that is optimized for search engines. This typically involves choosing a theme that is lightweight, fast-loading, and includes clean, valid HTML and CSS code. Some popular WordPress themes that are optimized for SEO include Astra, GeneratePress, and Divi.
Step 2: Install an SEO plugin
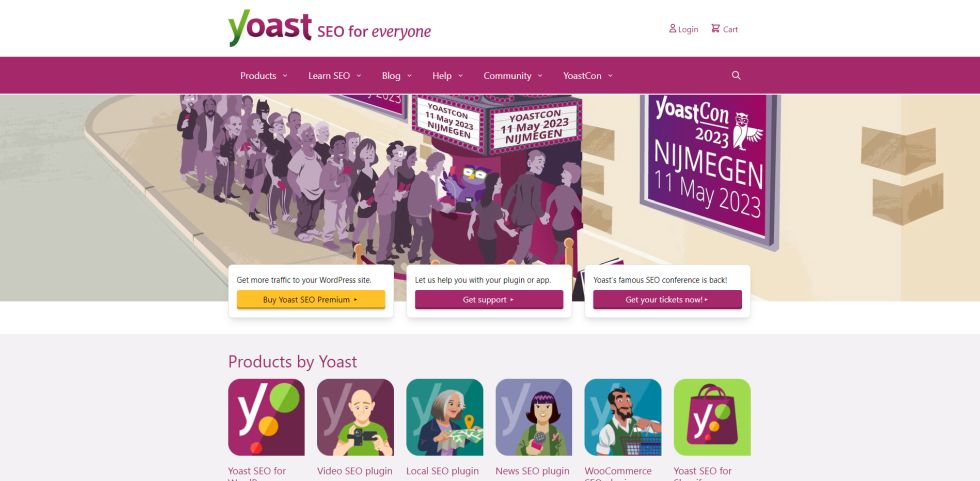
The second step in using WordPress for SEO is to install an SEO plugin. There are several SEO plugins available for WordPress, including Yoast SEO and The SEO Framework. These plugins provide a range of tools and features that can help you optimize your website for search engines, including keyword optimization, sitemap creation, and meta tag management.
Step 3: Optimize your content for search engines
The third step in using WordPress for SEO is to optimize your content for search engines. This involves creating content that is relevant, valuable, and high-quality, and using keywords and phrases that are relevant to your target audience. It’s also important to use descriptive and meaningful headlines, subheadings, and alt tags for images.
Step 4: Use internal linking
The fourth step in using WordPress for SEO is to use internal linking. Internal linking involves linking related pages and posts on your website, and helps search engines understand the structure and hierarchy of your content. This can also help visitors navigate your site and find the information they are looking for.
Step 5: Use social media to promote your content
The fifth and final step in using WordPress for SEO is to use social media to promote your content. This involves creating and sharing high-quality content on your social media accounts, and engaging with your followers. Social media signals, such as likes and shares, can help improve your website’s visibility and ranking in search engines.
In conclusion, using WordPress for SEO is a great choice for improving your website’s visibility and ranking in search engines. By following the steps outlined above, you can create a website that is optimized for search engines and provides a great user experience for your visitors. So if you’re looking to improve your website’s SEO, consider using WordPress as your platform!
13.) How do I add images and videos to my WordPress site?
Adding images and videos to your WordPress site can help make your content more visually appealing and engaging for your visitors. WordPress makes it easy to add images and videos to your site with a simple and intuitive interface.
Step 1: Upload images and videos to the media library
The first step in adding images and videos to your WordPress site is to upload them to the media library. To do this, go to the WordPress dashboard and select “Media” from the left-side menu. Then, click on the “Add New” button to upload your images and videos.
Step 2: Insert images and videos into posts and pages
Once your images and videos are in the media library, the next step is to insert them into your posts and pages. To do this, simply go to the post or page where you want to add an image or video, click on the “Add Media” button, and select the image or video you want to insert.
Step 3: Configure image and video settings
The third step in adding images and videos to your WordPress site is to configure the settings for each image and video. This includes setting the size, alignment, and caption for each image, and the embed code for each video. You can also choose to link each image to a specific URL, such as a product page or a blog post.
Step 4: Optimize images and videos for performance
The fourth step in adding images and videos to your WordPress site is to optimize them for performance. This involves compressing images and videos to reduce their file size, which can help improve your site’s loading speed. You can use plugins like WP Smush or EWWW Image Optimizer to automatically optimize your images and videos.
Step 5: Use featured images for posts and pages
The final step in adding images and videos to your WordPress site is to use featured images for your posts and pages. Featured images are the images that represent your posts and pages in various areas of your site, such as the homepage, archive pages, and search results. To set a featured image for a post or page, simply go to the post or page editor, click on the “Featured Image” box, and select an image from the media library.
In conclusion, adding images and videos to your WordPress site is a great way to make your content more visually appealing and engaging for your visitors. With the simple and intuitive interface provided by WordPress, you can easily upload, insert, and configure images and videos on your site. So start adding images and videos to your WordPress site today and make your content stand out!
14.) How do I backup my WordPress site?
Backing up your WordPress site is an important step in protecting your content and ensuring that you can restore your site if something goes wrong. In this essay, I will walk you through the process of backing up your WordPress site, so you can feel confident that your data is safe.
Step 1: Decide what you want to backup
The first step in backing up your WordPress site is to decide what you want to include in your backup. Typically, you will want to backup your entire site, which includes the WordPress database and all of the files in your WordPress installation. This will ensure that you have a complete copy of your site and can restore it if necessary.
Step 2: Choose a backup method
The next step in backing up your WordPress site is to choose a backup method. There are several options available, including:
Manual backup: You can manually backup your site by exporting your database and copying all of the files in your WordPress installation to your local computer. This is a simple and effective method, but it can be time-consuming if you have a large site.
Backup plugins: There are several backup plugins available for WordPress, including UpdraftPlus, BackupBuddy, and VaultPress. These plugins automate the backup process, making it easy to backup your site and schedule regular backups.
Hosting backup: Some web hosting companies offer automatic backup services, which can be a convenient option if you have a large site and don’t want to manage your own backups.
Step 3: Create a backup
Once you have chosen a backup method, the next step is to create a backup. If you are using a backup plugin, simply install the plugin and follow the instructions to create a backup. If you are manually backing up your site, you will need to export your database and copy all of the files in your WordPress installation to your local computer.
Step 4: Store your backup securely
The final step in backing up your WordPress site is to store your backup securely. This is important because if your site is lost or damaged, you will need to access your backup in order to restore it. You should store your backup on a separate storage device, such as an external hard drive or a cloud storage service like Google Drive or Dropbox.
In conclusion, backing up your WordPress site is an important step in protecting your content and ensuring that you can restore your site if something goes wrong. By choosing a backup method, creating a backup, and storing your backup securely, you can feel confident that your site is safe and secure. So start backing up your WordPress site today and protect your content for the future!
15.) How do I update WordPress?
Keeping your WordPress site updated is important for maintaining its security, stability, and functionality. In this essay, I will walk you through the process of updating WordPress, so you can keep your site up-to-date and secure.
Step 1: Backup your site
Before you update WordPress, it is important to backup your site. This will ensure that you have a copy of your site and can restore it if something goes wrong during the update process. You can backup your site using a backup plugin or by manually copying the files and database of your site.
Step 2: Check the current version
Before you update WordPress, you should check the current version of your site. This can be done by logging into the WordPress dashboard and checking the Updates section. If there is an available update, you will see a notification and the option to update.
Step 3: Update WordPress
Once you have backed up your site and checked the current version, you are ready to update WordPress. There are two ways to update WordPress:
Automatic update: If you have enabled automatic updates in the WordPress dashboard, your site will be updated automatically in the background. You will receive a notification when the update is complete.
Manual update: If you prefer to update WordPress manually, you can do so by downloading the latest version from the WordPress.org website and uploading it to your site. This is a more complex process, but it gives you more control over the update process.
Step 4: Check for compatibility
After you have updated WordPress, it is important to check for compatibility with your theme and plugins. Some plugins and themes may not be compatible with the latest version of WordPress, which can cause issues with your site. If you encounter any problems, you can contact the plugin or theme developer for support.
Step 5: Test your site
Finally, after you have updated WordPress, you should test your site to make sure everything is working properly. This includes checking the front-end of your site, testing your forms and other functionality, and making sure that your plugins and theme are still working correctly.
In conclusion, updating WordPress is an important step in maintaining the security, stability, and functionality of your site. By following these steps, you can update WordPress with confidence and ensure that your site is running smoothly and securely. So keep your WordPress site up-to-date and enjoy the benefits of the latest features and security updates!
In conclusion, WordPress is a flexible and user-friendly website creation platform that is suitable for a wide range of websites and businesses. By understanding the answers to these frequently asked questions, you can make the





0 Comments